


-
District related
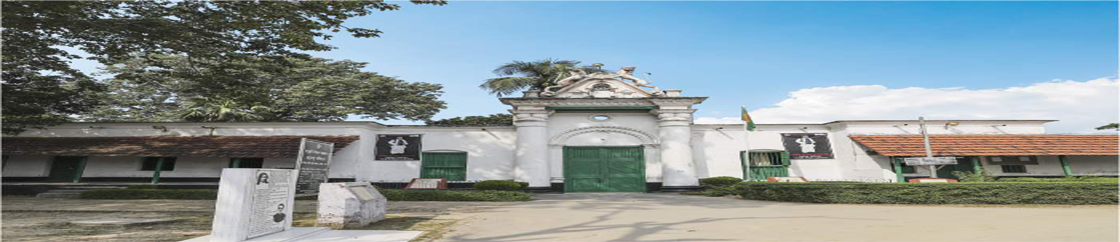
About District
History-Tradition
Geographic & Economic
Miscellaneous
-
District Administration
Deputy Commissioner
Additional deputy commissioner
Officers & Staffs
About Sections
Important Information
Office Of the Deputy Commissioner
District E-Seba Center
-
Local Govt.
District Council
Municipality
Upazila Council
-
Govt Office
Law-discipline and safety issues
-
Tourist Police, Naogaon Zone
-
□ District and Sessions Judge Court, Naogaon
-
□ Office of the Superintendent of Police , Naogaon
-
Fire service and Civil Defense
-
Anti-Corruption Commission, Integrated District
-
□ District Commandant, Ansar and Village Defense Office, Naogaon
-
□ Naogaon District Jail, Naogaon
-
□ RAB
-
□ Department of Narcotics Control, Naogaon
-
বর্ডার গার্ড বাংলাদেশ
-
Commandant of Police Training Center, naogaon
Education and Culture
-
□ District Primary Education Office, Naogaon
-
□ Primary Teachers Training Institute (PTI), Naogaon
-
□ Bangladesh Shishu Academy
-
□ District Education Office, Naogaon
-
□District Bureau of Non-formal Education
-
□District Sports Office
-
নওগাঁ পলিটেকনিক
-
District Government Publiclibrary
-
Jela cultural acedime
-
নওগাঁ মেডিকেল কলেজ
-
আঞ্চলিক সমবায় ইন্সটিটিউট
Agriculture and food related issues
-
□ Department of Agricultural Extension, Naogaon
-
□ Barind Multipurpose Development Authority (BMDA), Regian-1, Naogaon
-
□ District Food Controller\'s Office, Naogaon
-
□ District Livestock Office
-
□ District Fisheries Officer\'s Office
-
□ District Marketing Office, Naogaon
-
□BADC (Seed Marketing) Naogaon
-
□ Regional Duck Reproduction Farm, Naogaon
-
□ BADC (FS, C) Naogaon
-
মূখ্য পাট পরিদর্শকের কার্যালয়
-
District Food Controller\'s Office, Naogaon
-
District Bij protoyon agenci
-
মৃত্তিকা সম্পদ উন্নয়ন ইনিউস্টিউট,আঞ্চলিক কার্যালয়, নওগাঁ
-
Bangladesh Food Safety Authority, District Office, Naogaon
Engineering and communication
-
Public Works Department, Naogaon
-
Department of Public Health Engineering
-
Bangladesh Water Development Board, Naogaon
-
Local Government Engineering Department Naogaon
-
Education Engineering Department
-
Power Development Board
-
Naogaon Palli Bidyut Samity
-
pbs2.naogaon.gov.bd
-
Bangladesh Power Development Board, Naogaon
-
BRTA,Naogaon
-
Roads and Highways
-
BTCL
-
BADC
-
BMDA
-
DOICT, Naogaon
-
পল্লী বিদ্যুতায়ন বোর্ড, নওগাঁ
Health related
Others Office
-
□ Regional Passport Office, Naogaon
-
□ Office of the Deputy Commissioner, Circle-3, Naogaon
-
□ Office of the Deputy Commissioner, Circle-4, Naogaon
-
□ Office of the Deputy Commissioner, Circle-5, Naogaon
-
□ District Information Officer\'s Office
-
□ Office of the District Relief and Rehabilitation Officer
-
District Accounts Office
-
Deputy Director\'s Office, District Statistics Office, Naogaon
-
Import and Export Assistant Regulatory Department
-
National Consumer Rights Protection Directorate
-
আমদানী ও রপ্তানী
-
Custmos
-
Forest Office
-
Post
-
District Environment Directorate Office - Naogaon District
About Human Resources Development
-
□District Co-operative Office, Naogaon
-
□District Women Affairs Officer\'s Office
-
□ District Social Welfare Office, Naogaon
-
□ Department of Youth Development
-
□Islamic Foundation Naogaon
-
শহর সমাজসেবা
-
সরকারি শিশু পরিবা
-
জাতীয় মহিলা সংস্থা
-
Cooperative Zonal Institute, Naogaon
-
Protibondhi Sheba-O-Sahajjyo Kendro, Naogaon
-
Department of Inspection for Factories and Establishments, Office of the Deputy Inspector General, Naogaon
-
বাংলাদেশ পল্লী উন্নয়ন বোর্ড (বিআরডিবি)
-
Tourist Police, Naogaon Zone
-
Other Institutions
Educational Institution
Organization / organization
Private companies
-
E-Service Center
Trade and commerce branches
National e-service
জেলা ই- সেবা কেন্দ্র
-
Gallery
gallery
-
District related
About District
History-Tradition
Geographic & Economic
Miscellaneous
-
District Administration
Deputy Commissioner
Additional deputy commissioner
Officers & Staffs
About Sections
Important Information
Office Of the Deputy Commissioner
District E-Seba Center
-
Local Govt.
District Council
Municipality
Upazila Council
-
Govt Office
Law-discipline and safety issues
- Tourist Police, Naogaon Zone
- □ District and Sessions Judge Court, Naogaon
- □ Office of the Superintendent of Police , Naogaon
- Fire service and Civil Defense
- Anti-Corruption Commission, Integrated District
- □ District Commandant, Ansar and Village Defense Office, Naogaon
- □ Naogaon District Jail, Naogaon
- □ RAB
- □ Department of Narcotics Control, Naogaon
- বর্ডার গার্ড বাংলাদেশ
- Commandant of Police Training Center, naogaon
Education and Culture
- □ District Primary Education Office, Naogaon
- □ Primary Teachers Training Institute (PTI), Naogaon
- □ Bangladesh Shishu Academy
- □ District Education Office, Naogaon
- □District Bureau of Non-formal Education
- □District Sports Office
- নওগাঁ পলিটেকনিক
- District Government Publiclibrary
- Jela cultural acedime
- নওগাঁ মেডিকেল কলেজ
- আঞ্চলিক সমবায় ইন্সটিটিউট
Agriculture and food related issues
- □ Department of Agricultural Extension, Naogaon
- □ Barind Multipurpose Development Authority (BMDA), Regian-1, Naogaon
- □ District Food Controller\'s Office, Naogaon
- □ District Livestock Office
- □ District Fisheries Officer\'s Office
- □ District Marketing Office, Naogaon
- □BADC (Seed Marketing) Naogaon
- □ Regional Duck Reproduction Farm, Naogaon
- □ BADC (FS, C) Naogaon
- মূখ্য পাট পরিদর্শকের কার্যালয়
- District Food Controller\'s Office, Naogaon
- District Bij protoyon agenci
- মৃত্তিকা সম্পদ উন্নয়ন ইনিউস্টিউট,আঞ্চলিক কার্যালয়, নওগাঁ
- Bangladesh Food Safety Authority, District Office, Naogaon
Engineering and communication
- Public Works Department, Naogaon
- Department of Public Health Engineering
- Bangladesh Water Development Board, Naogaon
- Local Government Engineering Department Naogaon
- Education Engineering Department
- Power Development Board
- Naogaon Palli Bidyut Samity
- pbs2.naogaon.gov.bd
- Bangladesh Power Development Board, Naogaon
- BRTA,Naogaon
- Roads and Highways
- BTCL
- BADC
- BMDA
- DOICT, Naogaon
- পল্লী বিদ্যুতায়ন বোর্ড, নওগাঁ
Health related
Others Office
- □ Regional Passport Office, Naogaon
- □ Office of the Deputy Commissioner, Circle-3, Naogaon
- □ Office of the Deputy Commissioner, Circle-4, Naogaon
- □ Office of the Deputy Commissioner, Circle-5, Naogaon
- □ District Information Officer\'s Office
- □ Office of the District Relief and Rehabilitation Officer
- District Accounts Office
- Deputy Director\'s Office, District Statistics Office, Naogaon
- Import and Export Assistant Regulatory Department
- National Consumer Rights Protection Directorate
- আমদানী ও রপ্তানী
- Custmos
- Forest Office
- Post
- District Environment Directorate Office - Naogaon District
About Human Resources Development
- □District Co-operative Office, Naogaon
- □District Women Affairs Officer\'s Office
- □ District Social Welfare Office, Naogaon
- □ Department of Youth Development
- □Islamic Foundation Naogaon
- শহর সমাজসেবা
- সরকারি শিশু পরিবা
- জাতীয় মহিলা সংস্থা
- Cooperative Zonal Institute, Naogaon
- Protibondhi Sheba-O-Sahajjyo Kendro, Naogaon
- Department of Inspection for Factories and Establishments, Office of the Deputy Inspector General, Naogaon
- বাংলাদেশ পল্লী উন্নয়ন বোর্ড (বিআরডিবি)
-
Other Institutions
Educational Institution
Organization / organization
Private companies
-
E-Service Center
Trade and commerce branches
National e-service
জেলা ই- সেবা কেন্দ্র
-
Gallery
gallery
Protecting your camera's lens is crucial, but eventually, you'll need to remove that protective layer. This guide will walk you through the process, explaining different types of protectors and offering tips for a smooth, scratch-free removal. We'll cover everything from understanding your lens protector to mastering the removal technique, ensuring your camera lens remains pristine.
Understanding Your Camera Lens Protector
Types of Lens Protectors
Camera lens protectors come in various forms, each requiring a slightly different removal method. The most common types include:
-
Film protectors: These are thin, plastic films applied directly to the lens. They're often found on new cameras.
-
Glass protectors: Thicker and more durable than film protectors, they offer superior scratch resistance.
-
Hard cases with integrated protectors: Some camera cases come with built-in lens protection.
Identifying the type of protector you have is the first step in determining the best removal method. For instance, a delicate film protector requires a gentler approach than a robust glass protector. I remember once struggling to remove a stubborn film protector from my old Canon EOS Rebel T6i, only to realize I was using too much pressure. A little patience and the right technique solved the problem perfectly. Understanding the material makes all the difference.
Different brands also offer varying levels of adhesion. Some are designed to be easily removable, while others are more permanently attached, offering superior protection. This needs to be considered when choosing your removal strategy. For example, a cheaper film protector might be easier to remove but offer less long-term protection compared to a higher-priced, more durable glass protector from a well-known brand like Zeiss or B+W.
Think of it like choosing between a cheap phone screen protector that peels off easily versus a high-end tempered glass protector that requires a bit more care during removal. The better protected your lens is, the more careful you might need to be when removing the protector later.
Why Removing the Lens Protector Matters
Leaving the lens protector on can significantly impact image quality. The protector itself can introduce unwanted reflections, glare, and even slight blurring, especially in challenging lighting conditions. The added layer can reduce the sharpness and clarity of your photos. I once had a friend who didn’t remove their protector and couldn't understand why their photos looked slightly soft. The lens protector was the culprit. This is especially true with high-resolution cameras and professional-grade lenses capable of resolving fine details.
Furthermore, some protectors, particularly low-quality film protectors, can trap dust or fingerprints between the protector and the lens. This can further compromise image quality and lead to unsightly spots on your pictures. Think of it like a smudged window – you can't get a clear view through it. A clean lens without a protector allows for the clearest possible image capture. The investment in a good lens deserves the care of a clean, protector-free experience.
Removing the protector allows your lens to perform at its best and helps you appreciate the true optical quality of your investment. An expensive lens like the Canon EF 100mm f/2.8L Macro IS USM deserves to function without any hindering obstructions; that includes a lens protector that may have outlived its usefulness.
Preparing for Removal
Gathering Your Supplies
Before you start, gather the necessary tools. You won't need a complex toolkit, but having the right items makes the process much easier and safer. You will need:
-
A clean, lint-free microfiber cloth.
-
A small, flat object like a plastic card (an old gift card works great) or a specialized lens cleaning tool.
-
A well-lit area to ensure good visibility.
-
Optional: Lens cleaning solution (use a reputable brand and follow instructions carefully).
Avoid using anything sharp or metallic that could scratch your lens. Remember, patience is key. Rushing the process can easily damage your expensive camera lens. I once witnessed someone accidentally scratching their lens while trying to remove a stubborn protector with a metal tool – it was heartbreaking. Always prioritize careful and controlled movements.
The microfiber cloth is crucial because it prevents any further smudges or scratches during the removal process. A plastic card or similar tool allows for careful lifting and peeling, preventing sudden tearing or pulling. Good lighting ensures you can see exactly what you're doing, so you can avoid accidentally scratching the lens while removing the protector.
Creating the Right Environment
Choose a clean, well-lit workspace free from dust and debris. This will minimize the risk of particles getting trapped between the lens and the protector. The ideal environment is similar to what you might find in a professional camera shop: dust-free, well-illuminated and calm. I typically work at my desk near a window during daylight hours, ensuring plenty of natural light for clear visibility. The lighting is important so you can properly position the tool and remove the protector without the threat of introducing dust particles or lint onto your lens.
Consider using a magnifier to clearly see any trapped particles or edge lifting. If you have a cleanroom or a space designed for cleaning delicate electronics, that's even better. A clean environment is an important part of ensuring the process is clean and does not risk adding more dust or debris to the lens. Similar to cleaning a computer's internals, the focus should be on cleanliness and controlled movements.
Think of it like preparing for surgery; a clean and sterile environment will improve your results. Your lens, like a surgeon's scalpel, needs a pristine environment to function at its best. Avoiding dust or debris also ensures the best possible visual outcome during and after removing the protector. The more care you take in preparation, the better your final results will be.
Removing the Lens Protector
Step-by-Step Guide for Film Protectors
Film protectors are the most delicate. Begin by carefully lifting a small corner of the protector with your fingernail or the edge of a plastic card. Once you've created a small lift, use the card to gently peel the protector away from the lens, keeping the card flat against the surface of the protector to maintain even pressure and avoid causing creases or scratches.
Work slowly and deliberately, moving across the surface of the lens in one smooth direction. If you encounter resistance, do not force it. Instead, gently apply more pressure with the plastic card. I remember once encountering a particularly stubborn film protector. I proceeded extremely slowly, and by applying even pressure across the entire surface, I eventually lifted the film without a problem. Avoid abrupt movements or pulling the film at extreme angles, which can damage your lens.
After removal, gently clean the lens with a microfiber cloth to remove any remaining adhesive residue. A small amount of isopropyl alcohol (70% or lower) on the cloth can help remove stubborn residue, but be very cautious to not get any directly on your lens. This step is crucial to ensuring a clean and clear lens free of any lingering traces of the film protector. The result is a lens ready to capture crisp and clear images.
Step-by-Step Guide for Glass Protectors
Glass protectors are more durable than film protectors, but they still require careful handling. Start by finding a corner or edge of the protector that's slightly lifted or shows a small gap. Gently insert the edge of your plastic card into the gap. Unlike film, these glass protectors often have an adhesive edge only. Avoid inserting the card too deeply or at an angle, as this can scratch the lens. You'll want to lift this carefully and gradually, with as even a pressure as possible across the whole face of the protector.
Once the edge is lifted, slowly peel the protector back, applying consistent pressure with the plastic card. Keep the card flat to prevent bending and scratching. If the protector is resistant, use a gentle rocking motion to loosen the adhesive. I've found this technique to be especially useful with stubborn glass protectors from some of the lesser known manufacturers. Consistent, gentle pressure is your key to success. Avoid jerking or sudden pulls to prevent accidental damage.
After removal, use a microfiber cloth to clean the lens. Glass protectors can sometimes leave behind some adhesive residue. A drop or two of specialized lens cleaner (always following the manufacturer’s instructions) can help gently remove this adhesive without damaging the lens. The goal is a perfect, clean lens ready to show off its superior quality. This gentle and careful procedure results in a beautifully clean and functional lens.
Troubleshooting Common Issues
Dealing with Stubborn Adhesive
Sometimes, lens protectors leave behind sticky residue. For film protectors, a gentle wipe with a microfiber cloth may be sufficient. For glass protectors, you might need a specialized lens cleaning solution. Always test any cleaner on an inconspicuous area first.
Never use harsh chemicals or abrasive materials. These can damage the lens coating, reducing image quality and longevity. I once used a too-strong cleaning solution, accidentally damaging the anti-reflective coating on a lens – a costly mistake. So remember to always refer to the lens manufacturer's cleaning instructions and always do a test clean to avoid disaster.
If you’re using isopropyl alcohol, always dilute it with distilled water to avoid damaging the lens. Always follow the manufacturer's instructions on your chosen cleaning solution. A soft, damp cloth can often be surprisingly effective in removing any small residue particles or spots. Patience and a gentle touch are key to preventing damage.
Preventing Scratches
The key to avoiding scratches is using the right tools and techniques. Never use sharp objects like knives or metal tools. Always use a soft, flat plastic card or a dedicated lens cleaning tool. Work slowly and deliberately, avoiding sudden movements.
Keep the work area clean and dust-free. Dust particles can become trapped between the protector and the lens, leading to scratching during removal. A clean and dust-free work area prevents this from happening in the first place. Good lighting also helps you see what you’re doing, preventing accidental scratches from happening during this delicate process. Using a magnifier would also prove very helpful.
Think of it as performing a delicate operation – precision and patience are critical to success. Remember, a scratched lens can be an expensive problem, so be mindful of your actions. Practicing this process with a disposable lens protector can be helpful if you are feeling unsure or nervous about damaging your equipment.
Maintaining Your Camera Lens
Cleaning Your Lens
After removing the protector, it's essential to clean your lens properly. Use a high-quality microfiber cloth to gently wipe away any dust or fingerprints. For stubborn smudges, you can use a specialized lens cleaning solution, following the manufacturer's instructions carefully.
Avoid using household cleaners or abrasive materials, which can damage the lens coating. It’s worth emphasizing again that delicate lenses are easily damaged and need careful cleaning. Always treat your lens with respect and avoid forceful wiping, using very gentle strokes to avoid scratches.
Regular cleaning will keep your lens free from dust, oil and smudges. Keeping your lens clean protects it from unwanted dust and other particles that might reduce the quality of your shots. With a clean lens, you can ensure you are receiving the best possible image quality from your camera and its lens.
Choosing the Right Lens Protector
Factors to Consider
When choosing a replacement protector (or a new one for a different camera), consider the following factors:
-
Material: Glass protectors generally offer better protection but can be more expensive and more difficult to remove than film protectors.
-
Thickness: Thicker protectors offer better scratch resistance but may lead to vignetting (darkening of the corners) on some lenses.
-
Adhesive: The adhesive strength should provide good protection but still allow for relatively easy removal when it's time. Look for brands and products with reviews that indicate how easy the removal process is.
I recommend reading reviews of lens protectors before purchasing. This way, you'll have an understanding of their removal process and how difficult it might be before purchasing. The reviews might also reveal which brands or types of protectors are generally easy to remove compared to others. It will save you from an unexpected hassle.
Consider the type of photography you do. If you are frequently changing lenses, you might opt for a less adhesive, easier to remove option. If you rarely change lenses and prefer maximum protection, a more permanent, high-quality glass protector might be the better option. Reading reviews and comparing different options will greatly assist you in making the best purchasing decision for your needs and camera.
Beyond the Protector
Lens Care and Maintenance
Proper lens care extends beyond just the protector. Regular cleaning, using the appropriate techniques and solutions, is crucial for maintaining image quality and extending the life of your lens. Store your lenses in a safe, dry place, away from dust and extreme temperatures.
I always store my lenses in protective cases or pouches when not in use, helping to minimize exposure to dust and other harmful elements. Avoid touching the front element of the lens as much as possible to reduce the amount of oil and smudges, thereby also reducing the amount of cleaning required. With good care, a lens should give you many years of use.
Consider investing in a lens cleaning kit, which typically includes high-quality microfiber cloths, a blower bulb, and a cleaning solution designed specifically for camera lenses. Remember, a clean lens is a happy lens, directly impacting the quality of your photos and videos.
Frequently Asked Questions
What is the best way to remove a stubborn lens protector?
For stubborn protectors, patience and a gentle approach are key. Use a plastic card or dedicated tool to slowly and carefully work your way around the edges. A slight rocking motion can help loosen the adhesive. If residue remains, a small amount of diluted isopropyl alcohol (70% or less) on a microfiber cloth can help, but test it on an inconspicuous area first. Remember to always prioritize the safety of your camera lens.
Can I use soap and water to remove adhesive residue?
While soap and water might seem like a simple solution, it's generally not recommended for cleaning camera lenses. It can leave behind residue, and the water could damage internal components. Use a specialized lens cleaning solution or a small amount of diluted isopropyl alcohol (always following the manufacturer’s instructions) if necessary. The risk of water damage generally outweighs any potential benefits of using soap and water.
What should I do if I accidentally scratch my lens during removal?
If you accidentally scratch your lens, it's best to consult a professional camera repair technician. They can assess the damage and determine the best course of action. Minor scratches may be able to be buffed out, but deeper scratches may require more significant repairs. Preventing scratches in the first place is much easier than trying to fix them afterwards.
Are all lens protectors created equal?
No, lens protectors vary significantly in quality, material, and ease of removal. Some are designed for easy removal, while others offer superior protection but can be more challenging to take off. Always read reviews before purchasing to get an idea of the removal process and the quality of the product. Paying attention to the type of adhesive and the material used in the protector will give you an idea of how easy it might be to remove.
What happens if I leave the lens protector on indefinitely?
Leaving the lens protector on can significantly reduce image quality. It can introduce unwanted reflections, glare, and reduce sharpness. Dust and debris can also accumulate under the protector, further compromising image clarity. This can significantly degrade your photos. Always remove the lens protector to ensure your camera produces the best possible image quality.
How often should I clean my camera lens?
It's a good idea to clean your camera lens before and after each use. This minimizes the risk of dust and other particles reducing the quality of your photos and videos. You should also regularly check your lens for any smudges or debris and clean it accordingly. The best time to clean your lens is when you’ve got enough time to carefully do it.
Final Thoughts
Removing a camera lens protector might seem like a simple task, but doing it correctly ensures the longevity and performance of your valuable equipment. By following the steps outlined in this guide and using the appropriate tools, you can confidently remove your lens protector without damaging your lens. Remember, patience and a gentle touch are key. Taking your time and following the steps outlined ensures your lens remains undamaged and ready for stunning photography. With the right technique and a little care, you'll get crisp, clear images every time. So, go ahead and remove that protector – your camera lens (and your photos) will thank you for it!


Planning and Implementation: Cabinet Division, A2I, BCC, DoICT and BASIS
Technical Assistance:
![]()
Developed By: